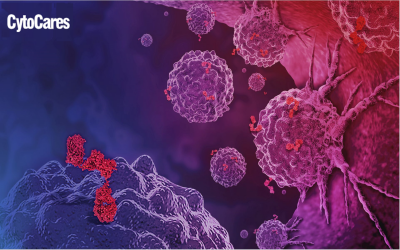
First job on the agenda was to replace the accident damaged front cross-member with a complete new front panel assembly (part # 62500-K0150). Replacing this part is usually pretty straight forward on most Datsuns unless they are heavily rusted. Normally you can just drill out all of the spot-welds which attach the panel to the inner wings and chassis legs, prep the surfaces and re-attach the new panel with spot or plug welds. As my 710 is reasonably solid around the engine compartment, the job should have been quite simple, however as I later found out, the accident damage had done more than just buckle the front cross-member.

I had a choice initially of just replacing the cross-member itself or the entire front panel assembly as I had both parts available in stash of parts. I elected to replace the entire front panel assembly in one as the replacement cross-member only forms the top, bottom and front of the section and the damage extended through to the rear of the panel. The area of the front panel adjacent to the front wings where the rubber seals sit had also started to rust in places so it seemed wise to replace the lot.

Removing the front panel assembly is generally quite easy. First I cleaned round the seams so that the spot welds were clearly visible then to make things clearer I marked each weld with a spot of fluorescent paint with a paint marker. Using a spot weld cutter, I drilled through the front panel until each weld was broken, leaving the panel behind largely untouched. Occasionally the drill wasn’t big enough to cut the weld entirely so I did the final removal using an air chisel. Once the panel was off, I ground back all the mounting surfaces with a flap wheel mounted on a small angle grinder and rust treated any surface rust with Bilt Hamber Deox Gel.

So far so good. Before installing the new front panel I prepped the inside of it by stripping it to bare metal with a wire wheel in an air drill. Time consuming but it’s way easier to prep this panel before it’s in place. the outside can be prepped later. To attach the panel and provide a factory finished appearance, it necessary to plug weld it into place. This comprises of drilling holes where the spot welds would normally be and welding through them to attach the two layer. The welds can be ground smooth later.

Once the front panel was slotted into place it was clear that something wasn’t quite right. The panel sat straight between the chassis rails and the left hand side all lined up nicely but at the top right corner the inner wing was about 8mm out of alignment. You can see the misalignment on the picture below left.

Looking at the previous damage it’s possible that the impact could have pushed the inner wing outwards a little so some brute force was required to pull it back. First off I slung a chain winch between the tension compression rod mounts and pulled them together so that the front cross-member was held snugly between the chassis legs. I aligned all of the left side of the front panel and welded it to the inner wings and to both chassis rails. Then to pull the top of the right hand inner wing inward, I used a webbing ratchet tie down hooked into the strut top mounts. This actually pulled the inner wing top into place quite easily. Once straight it was also welded in and all the welds ground down.

The next stage was to replace the inner wing strengthener and fabricate a new wing mounting along the top of the inner wing.

2 Responses to “New Front Panel (710)”

  1. Big Hat says:

    was that nos core support originally being saved for the yellow?

  2. RatDat says:

    Fortunately I have two of them so I still have one for the yellow KP710, although I’ve no doubt a few of the other parts i have stashed away for that car will get used on this one!

Leave a Reply

You must be logged in to post a comment.